How To Make A Witch Hat Out Of Paper


Want to make it a witch costume at home? One of the most characteristic features of a witch is, of course, their hat. Therefore, we at OneHowTo will provide a step-by-step guide in this article on how to make a witch hat out of paper that you can make easily, at home with readily available materials. Surprise your friends with an authentic, original and DIY costume.
You'll need:
- Construction paper (similar to cardboard)
- Scissors
- Pencil
- A ruler
- Thread
- Glue
- Compass
- Stapler
- Optional: glitter, sparkles or other materials to decorate the finished hat
Steps to follow:
The first step to make a witch hat out of paper is to get all of the necessary tools.
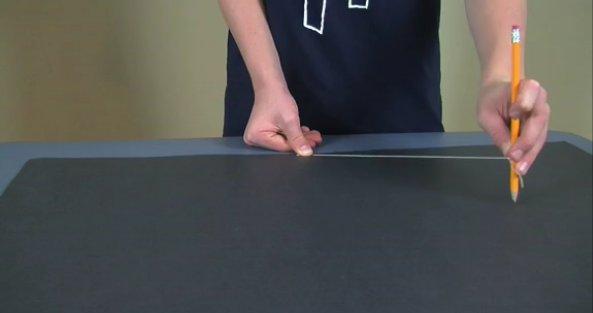
First, get hold of a piece of black construction paper. Draw a semi-circle with a compass (if you don't have a compass, tie a string to a pencil and anchor the thread in one spot). Make sure the semi-circle is large enough to fit your head comfortably.

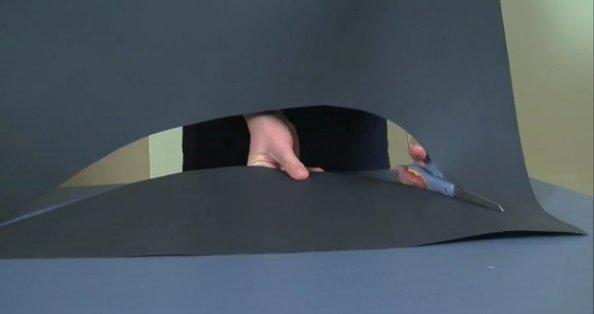
Then cut out the semicircle and shape it into a cone. Attach the point at which the two sides of paper meet using the stapler and try on the hat for size. If it's too big or small, remove the staples and try again. For a more secure fit, consider using a bit of tape along the seam before stapling.

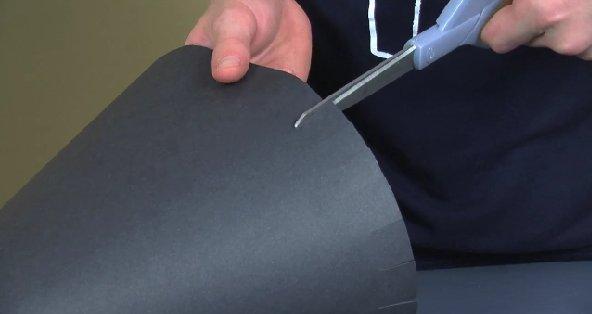
When you've achieved the right size, apply glue along the seam to ensure it holds firmly. To make the edge of the witch hat, cut out small tabs of about 2 cm (0.75 in) along the bottom of the cone. These tabs will help secure the brim later.

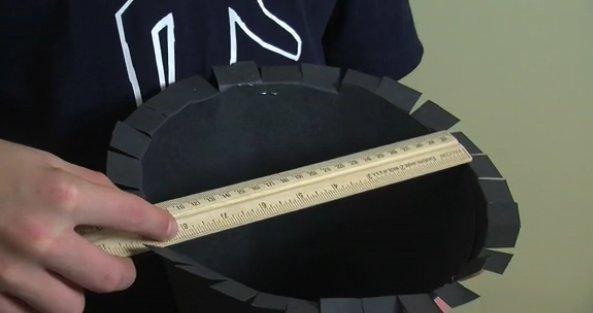
The next step is to bend the tabs out to create the base which will be attached to the witch hat. Measure the inside diameter of the cone. Use this measurement to create a circle on a piece of black construction paper. The midpoint of the measurement will be the center of the circle, on which you will support the thread or compass. In other words, if the inner diameter of the cone is 20 cm (8 in), the circle you'll draw will have a radius of 10 cm (4 in). This precise measurement ensures a snug fit for the brim.

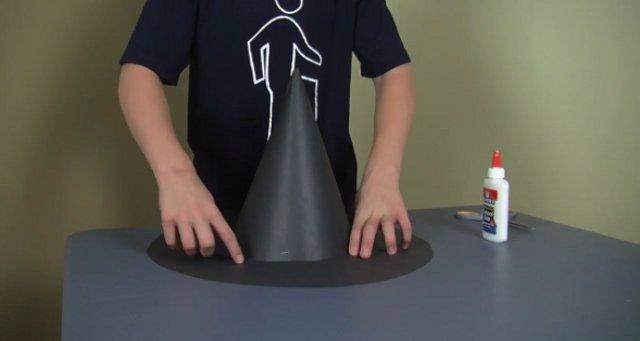
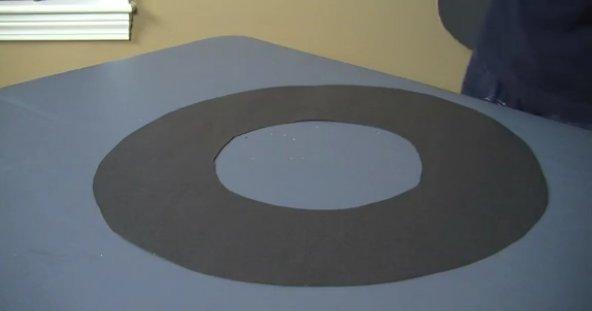
Next, draw a larger circle. The center is the same for both circles. This will become the outer edge of the hat's brim. Its size will depend on your taste and you'll need to experiment a bit. Cut the larger circle and then cut inside where the small circle is; it should look like a tire when cut properly. Make sure the brim is wide enough to complement the cone without overpowering it.

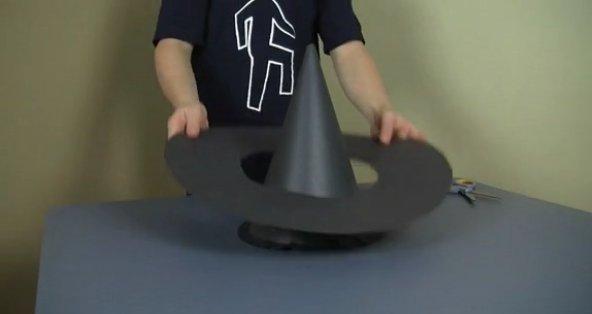
To finish making the witch hat, attach the brim to the cone. Make the necessary adjustments before applying the glue and press firmly. Ensure that the tabs are well aligned with the inner circle of the brim for a neat finish. When dry, start decorating the hat. You could add ribbons, glitter, or even small faux flowers for a unique touch.

If your witch costume is for Halloween, why not check out our DIY Fancy dress costumes section at OneHowTo to find the perfect costume you can make yourself at home. Additionally, consider pairing your hat with a tattered robe or a cloak to enhance the witchy look.
If you want to read similar articles to How To Make A Witch Hat Out Of Paper, we recommend you visit our Festivities & Celebrations category.


